Blender is an awesome free 3d application which provide similar functionality like Autodesk Maya, 3ds Max and Cinema 4d. Blender is a powerful easy to use 3d application if learned wisely. If you are a user of other 3d application you may get confused with nonstandard GUI, keyboard shortcuts and lack of well detailed documentation.
I was one of the failed Blender climbers who tried several times Blender before. But being stuck with Autodesk Maya, it was a pain to learn other 3d software. I even tried Cinema 4d which is very easy to learn but failed. So I understood that Blender is not hard but my love for Maya is so strong. So I just started using Blender in my home and production and soon I get used with Blender. Now I can make motion graphics with Blender easily and am still learning it. Anyway during my experiments with Blender I found that there are so many gaps in the area of Blender tutorials. So I am adding more tutorials about Blender.

Enough introductions. We can now learn to use Blender render layers efficiently in production. Don’t expect very complex set up, but I will guide you through three cubes in a scene and with render layers. It will be easy to follow and understand. I am adding a text version but I recommend watching the video tutorial.
Author : FermiCG
Software : Blender 2.68a
Difficulty : Beginner
Download : Render Layer cubes finished.blend
Blender has a well coded render layer, render passes and compositing work flow. Once you learn how things works inside Blender it is easy to use and straight forward than Maya’s render layer system.
This tutorial is based on blender 2.68a.But 2.6x series will work fine. If you don’t have blender download it free from blender.org.
Start with a new scene. You will get a default cube, camera and a light. Select the cube and add a new material and change the colour to red. (Find the material tab and press the + button and add a material. Change the diffuse colour to red.). 

In viewport duplicate the cube (shift +d) and delete the existing material by clicking – button on material tab. Add a new material and change colour to green.
Duplicate the cube again and replace the material with blue one.
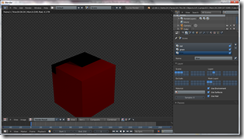
Place the cubes in such a way that they intersect each other. See the image.
Press 0 to look through the camera. If needed, adjust the camera so three cubes are in focus.
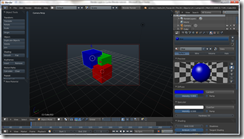 We are going to render the scene with cycles. So change to cycles render. Set the quality and dimensions. Optionally you can turn on transparency and RGBA. Press render and see how the render looks.
 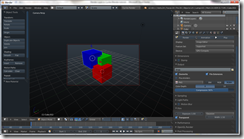 Jump to composite mode and see the connections. You will get a render layer node connected to composite node (just turn on nodes). We need to get three cubes in three different render layers. Back to default view.
 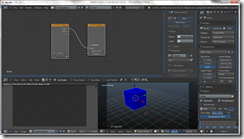 In order to get render layers properly, we need scene layers also. So select the green cube and press M and select 2nd layer. This will cause the green cube to be in 2nd scene layer.
 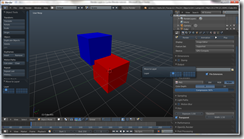 Select the blue cube and press M and select 3rd layer. You can click on each scene layer to confirm they are in correct order. Select first layer and render. Now we have the red one with lighting. Select second layer and render. 2nd and 3rd layer won’t have any lights or shadow. Select 1, 2 and 3 layer (shift select) and render again. We will get all the cubes with light and shadow.
We successfully created scene layers. But we need render layers. So find the render layer tab in properties menu.
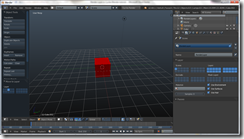 You can see a drop down window with render layer inside and “+, -“sign outside. This is the render layer tab. Below that you can see layer tab. Expand it and you will get scene, layer, exclude and mask with 20 columns each. They are different render layer settings. The first one scene is same for the scene layer in viewport. You can click on 1, 2 and 3 scene layer to check. The layer in the right is actual render layer. So select the 1st scene layer and rename the render layer to red. Also select the 1st column in layer. Make sure you are not selecting anything else.
 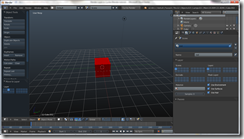 Select the 2nd scene layer and add a new render layer by pressing + button. Rename to green. Select the 2nd column under layer.
 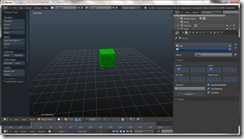 Select 3rd scene layer and add a new render layer. Rename it to blue. Select the 3rd column under layer.
Select all the three scene layer and render.
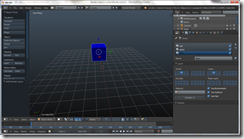 Blender will render the cubes one after other. You may see black holes in render. You will get something similar to this.
 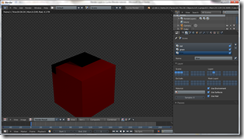 Switch to composite view. You can see render layers is connected to composite node. Select the render layers and click on the layers and chose different layer. You can use this for further compositing.
 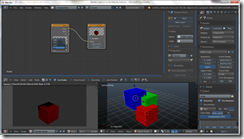 Leave it to red. Duplicate render layers 2 times (shift +d) and change the 2nd one to green and 3rd to blue. (Shift+ backspace for full view).
Now connect the image of red to the bottom image of alpha over node.
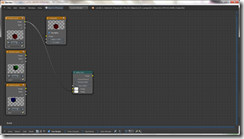 Add another alpha over node. Connect the blue image to bottom image of 2nd alpha over node. Also connect image of 1st alpha over to the top image of 2nd alpha over node.
 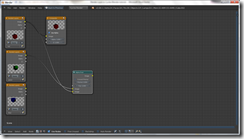 Now we need to connect the 2nd alpha image to the composite node. You can lose the connection between red layer and composite node.
Connect the second alpha over image to the image of viewer node.
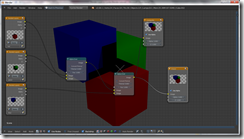 Now we have the composited image. You can swap the connection between render layers with alpha over node. But still you won’t get the original output. The black hole remains there. In order to get rid of those black holes we need to add mask layers. Switch to default view. Select the red render layer (which contains red cube) and under mask layers select 2nd and 3rd columns because we need them as mask for the first layer. Repeat the same for all the layers. Remember you need to choose the layers you want to mask. For green, use 1st and 3rd. for blue use 1st and 2nd.
 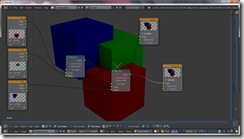 Now we have the cubes in correct order. You can swap the connection and still the render is the same.
We need to explain one more render layer settings named exclude layer. Exclude layer in Blender is used for excluding something from render. For example we have a plane just intersecting the three cubes. We need to render the plane separately without having any shadow or mask, we can use exclude layer. Additional use of exclude layer can be explored on further tutorials.
So add a plane and place it in such a way that it intersects the cubes and faces towards the camera.
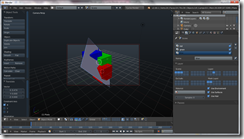 Move it to a new scene layer (4).Add a new render layer named plane. Set the render layer. Don’t use any mask layer.
 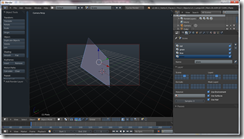 Jump to composite mode. Add a new alpha over node and a render layer node. Change the render layer to plane. Connect it to the bottom image of 3rd alpha over node. You need to connect the 2nd alpha over node to the top image of 3rd alpha over node. Also connect the 3rd alpha over to the viewer node and composite node. Render to see the result. You should get something like this.
 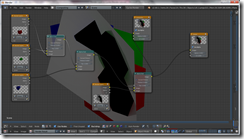 We need the plane as it is. Shift to default view and in the render layer settings select the plane render layer. In the exclude layer select 1, 2 and 3 column. Select the entire scene layer and render again. Now we will get
This concludes the render layer in Blender tutorial.
Hope you enjoyed this tutorial. Drop your comments and critiques.




No comments:
Post a Comment